1.router-link的replace属性
*给router-link添加replace属性后页签不能后退:

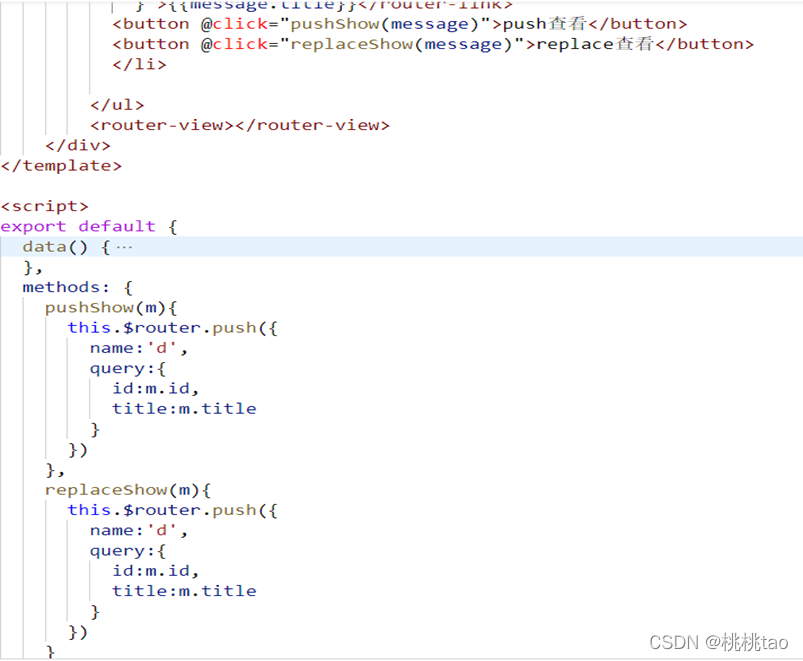
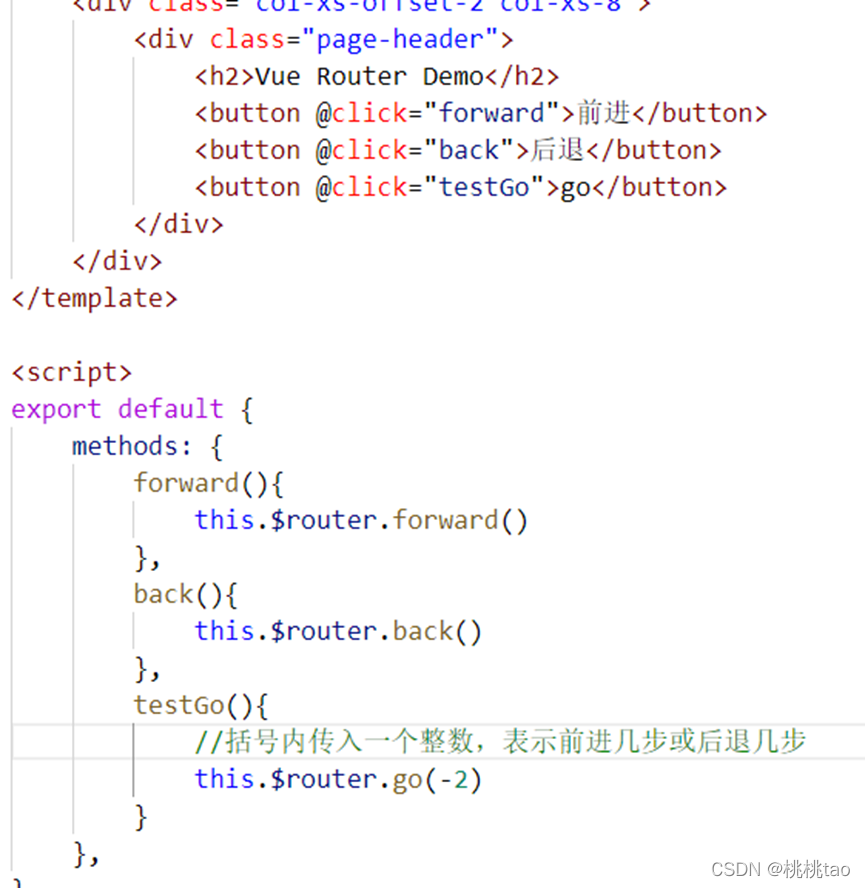
2.编程式路由导航
*作用:不借助router-link实现路由的跳转,让落跳转更加灵活:
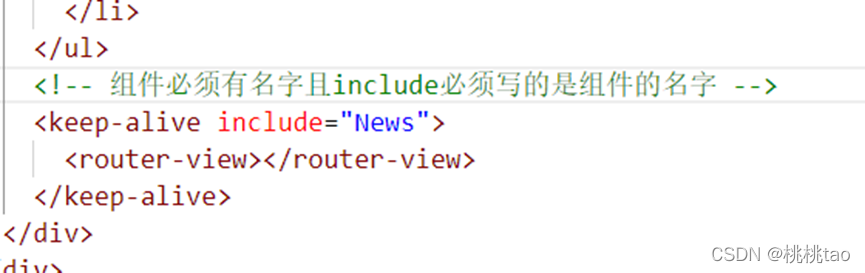
3.缓存路由组件
*作用:让不展示的路由组件保持挂载,不被销毁
<keep-alive include='组件的名字'>
<router-view></router-view>
</keep-alive>
4.两个新的生命周期钩子
*路由组件特有的两个生命周期钩子:activated、deactivated
用于捕获路由组件的激活状态
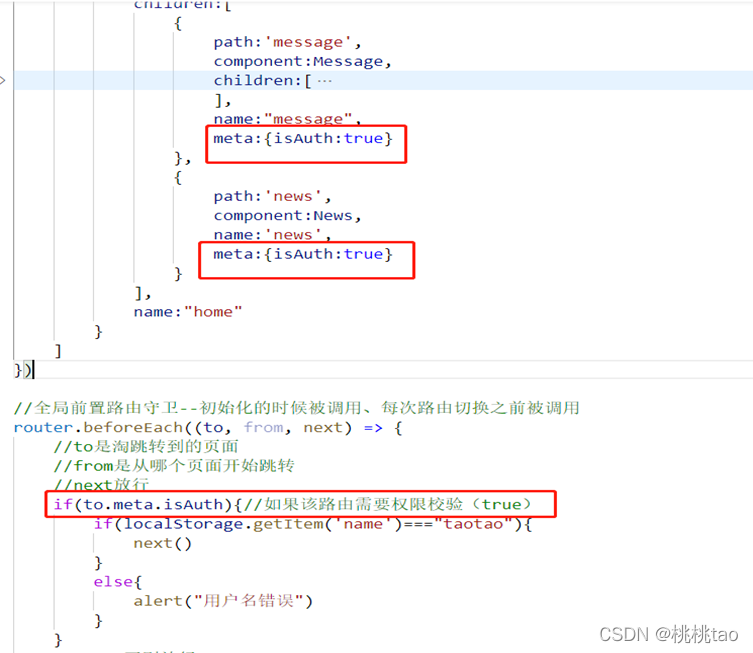
<template> <ul> <h2 :style="{opacity}">欢迎学习</h2> <li>news001<input type="text"></li> <li>news002<input type="text"></li> <li>news003<input type="text"></li> </ul> </template> <script> export default { name:"News", data() { return { opacity:1 } }, activated(){ this.timer=setInterval(() => { this.opacity-=0.01 if (this.opacity<=0) { this.opacity=1 } }, 16); }, deactivated() { clearInterval(this.timer) }, } </script>5.全局前置_路由守卫
*meta{}//表示路由元信息,是用户自定义的信息
*简化上方代码:
在需要权限校验的路由里配置meta:
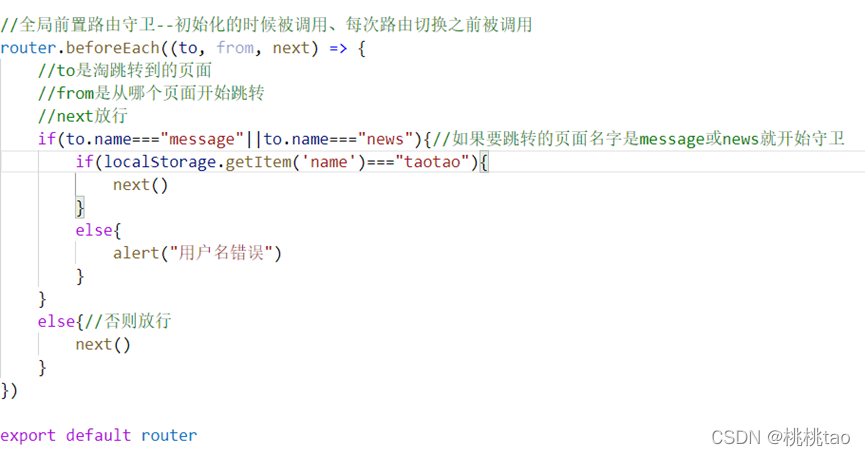
6.全局后置_路由守卫
*页面跳转后执行
//全局后置路由守卫 router.afterEach((to) => { document.title=to.meta.title || "硅谷系统" })7.独享路由守卫
*独享路由守卫,只有前置没有后置,规则和全局前置路由守卫一样,配置在某个路由中
beforeEnter: (to, from, next) => {
···
}
8.组件内路由守卫
<template> <div> <h2>我是About的内容</h2> </div> </template> <script> export default { //通过路由规则,进入该组件时被调用 beforeRouteEnter (to, from, next) { next() }, //通过路由规则,离开该组件时被调用 beforeRouteLeave (to, from, next) { next() } } </script>热门文章
- 1月23日 - 最高速度18.9M/S,2025年Clash Nyanpasu每天更新免费节点订阅地址
- 猫咪能听懂人说话吗,我让他揍孩子,她就去了(猫咪能听懂人的话吗?)
- 给动物打疫苗多少钱一针啊(给动物打的疫苗是什么)
- 猫咪三针多久打完啊(猫咪三针多久打完啊)
- 2月24日 - 最高速度20.7M/S,2025年Clash Nyanpasu每天更新免费节点订阅地址
- 1月4日 - 最高速度19.3M/S,2025年Clash Nyanpasu每天更新免费节点订阅地址
- 3月1日 - 最高速度21.4M/S,2025年Clash Nyanpasu每天更新免费节点订阅地址
- pytorch定义新的自动求导函数
- 买猫被骗了应该走什么程序(买猫被骗了应该走什么程序呢)
- 动物防疫疫苗种类有哪些类型(动物疫苗法最新消息2019)